Thursday, May 15, 2008

Shoot the moon II: Getting the most out of your binoculars


Part the First: Mount Up

The biggest pain in the butt about binoculars is that they shake. Or rather we do, no matter how we may try not to. If you can get rid of the shakes, using binoculars is awesome. But it ain't easy. Up until now I have done one of two things: steadied my binoculars against a nearby fence or wall, or steadied them against a monopod but without having them actually attached, just using the monopod as a sort of primitive mobile fencepost. But recently I came up with a better solution: I built a budget binocular bracket.

Lots of astronomy equipment companies sell dedicated binocular brackets, for mounting binoculars to monopods or tripods. The current issue of Sky & Telescope has a review of a premium model that costs $70. That's more than double the cost of my best pair of binoculars! Even the budget model from Orion costs $30.

Well, bump that. You can build your own for about $5. Go to the hardware store and pick up a steel angle bracket like the one shown in the photo above, some 1/4-20 nuts, and a 1-inch-long 1/4-20 thumbscrew. One of the holes in the bracket will fit over the 1/4-20 bolt on your monopod or tripod. Put on a nut and tighten 'er down. I used needle-nose pliers to get in there and get that nut nice and tight--you don't want your binoculars swinging in the breeze, no matter how cheap they were. Put a couple of nuts on the thumbscrew before you put it through the bracket--these act as spacers and keep the flat end of the thumbscrew from bumping up against the bracket when you tighten the rig. Then stick the thumbscrew through the bracket and screw it into the socket on the front of your binoculars. If the thumbscrew reaches the end of the socket before it's tight, pull it out and slip on one more nut as another spacer--that's what I had to do, and in the photo above you can just see the edge of the nut peeking out between the bracket and the socket on the binoculars.

Bang, you're done. Point the binoculars at something interesting and enjoy a completely shake-free view. I like running them up on my camera tripod and observing the moon without having to touch anything at all. I'm telling you, it's a qualitatively different experience from any binocular observing you've ever done in the past. And not just of astronomical targets--it's good for birds, landscapes, sunsets, your perverted neighbors, whatever.

And it's damn near free. If you use binoculars at all and own a tripod, there's no reason not to build one of these. And my tripod is not fancy--it's the absolute cheapest full-size model that Wal-Mart has to offer. It shakes and wobbles like crazy with a telescope on top, but it's plenty sturdy for a pair of binoculars or a camera.

Part the Second: Absolute basics of image processing


This is, no lie, the un-fiddled-with raw photo of the moon that I took through my Celestron 10x50 UpClose binoculars tonight. Well, okay, not completely un-fiddled-with. I did rotate and crop the image to get the moon in the middle and get rid of most of the empty field. But I didn't mess with any color or sharpness settings, so the moon itself is exactly as it came out of the camera.

I don't like to brag, but I was freaking amazed that I could get a picture that sharp using just binoculars. The 10x50s are quite a bit better than the Tasco 7x35s I used for my last attempt, but still. The image quality of the mounted binoculars is not far behind that of a small telescope, either visually or photographically (proof--compare these pictures to this one). The one advantage of even a small scope is that you can crank up the magnification if you want to see, for example, the rings of Saturn. On the other hand, binoculars are cheaper, lighter, easier to set up, and grab a lot more sky--all the reasons amateur astronomers use them in the first place.

Anyway, this part isn't about the binoculars. It's about what to do once you get a picture.


First thing, seriously, always, is Unsharp Mask. It looks like a gimmick but it's not. It can be overdone, like almost anything, but you should be able to play around with the settings minimally and find something that works. And it's available in just about every serious image processing program out there, including Photoshop and GIMP (the latter is free, BTW). The only difference between the photo immediately above and the one at the top of this section is that I applied Unsharp Mask in GIMP, using the default settings.

You'll notice some distracting color in both of the above images. The north edge of the moon is outlined in blue haze, and the southern end is an unwholesome-looking yellowish brown. That's chromatic aberration, and it's an unavoidable consequence of refracting light through glass. For telescopes you can buy anti-fringing filters, or super- or hyper-expensive apochromatic telescopes that use special kinds of glass to minimize CA, but even the best only knock it down to below the threshold of perception. It's impossible to completely get rid of. Physics is like that sometimes.

Let me amend that. It's impossible to completely get rid of in optical trains with refracting elements. A major advantage of reflecting telescopes is that they collect light with mirrors rather than lenses, so their views are blessedly free of CA.

Interestingly, I've never seen any CA on the moon through binoculars, and I've looked for it. Possibly the weak signal of color falling on my cones is just blown out by the intensity of light falling on my rods. Whatever the explanation, in my experience it is a strictly photographic problem.


This won't work for everything, but the moon is basically black and white in real life so it doesn't look weird if you convert the image to grayscale, as I've done here. And that's all I did--I didn't try to erase the dim halo around the northern regions, for example. It was always dim, and it only grabbed the eye because it was blue. Convert it to dark gray and it just disappears.


One last trick. I nudged up the contrast a little. It's really easy to overdo this, but if it's done right it certainly makes for a more interesting and pleasing image. The main problem with doing this on anything but a full moon is that the area near the terminator--the day/night line, where the lit part of the moon meets the unlit--drops off into blackness, and if you make the blacks blacker, the terminator appears to shift. Suddenly instead of describing a gentle curve or line from pole to pole, it zigs and zags as bright craters and dark maria pull it first one way and then the other. Which makes the photo look fake, because the real moon just doesn't look like that.

But there's an easy fix. Copy the image and paste it into a new layer. Bump up the contrast on that layer, and watch the terminator move. Once the contrast on everything else looks good, grab a big fuzzy eraser and erase the parts that got blackened out. The normally-lit terminator in the original image shows through. Flatten and save. You're done.

And so am I (UPDATE: no I'm not. Keep reading). Like I said, this is the bare bones of image processing. There's lots more here, and in many other places on the web. Have fun!

-------

Hoo boy, what a dumbass I am. The picture above is actually how not to do contrast. I screwed up bigtime, but I'm leaving it in as a teaching tool. There are two big problems with that image, and somehow my poor addled brain didn't catch them until this morning. The first is that I only grabbed part of the image when I copied and pasted, so there is a distinct black box from the contrasty layer visible against the skyglow from the original background. Lesson 1: copy the entire image into the layer you're going to mess with. The second problem is that I colored outside the lines with the eraser, so next to the terminator there is a weird light-colored strip like a fuzzy caterpillar (if you can't see this, try tilting your monitor so the image looks lighter. Lesson 2: if you're going to up the contrast and then erase some of the contrasty layer, you have to be careful not to get off of your foreground target or the brighter background will show through. Both problems are fixed in this version:


I'd like to be able to say that I planned this little goof/save in advance, but I didn't. Just shouldn't process images in a dark room or blog when I'm tired. Sheesh. Keeps me humble.

Now I'm going to take Mike's advice and get back to work. No sarcastic commentary needed.

Labels: , , , ,

Wednesday, July 26, 2006

Dr. Vector, Maker of Worlds


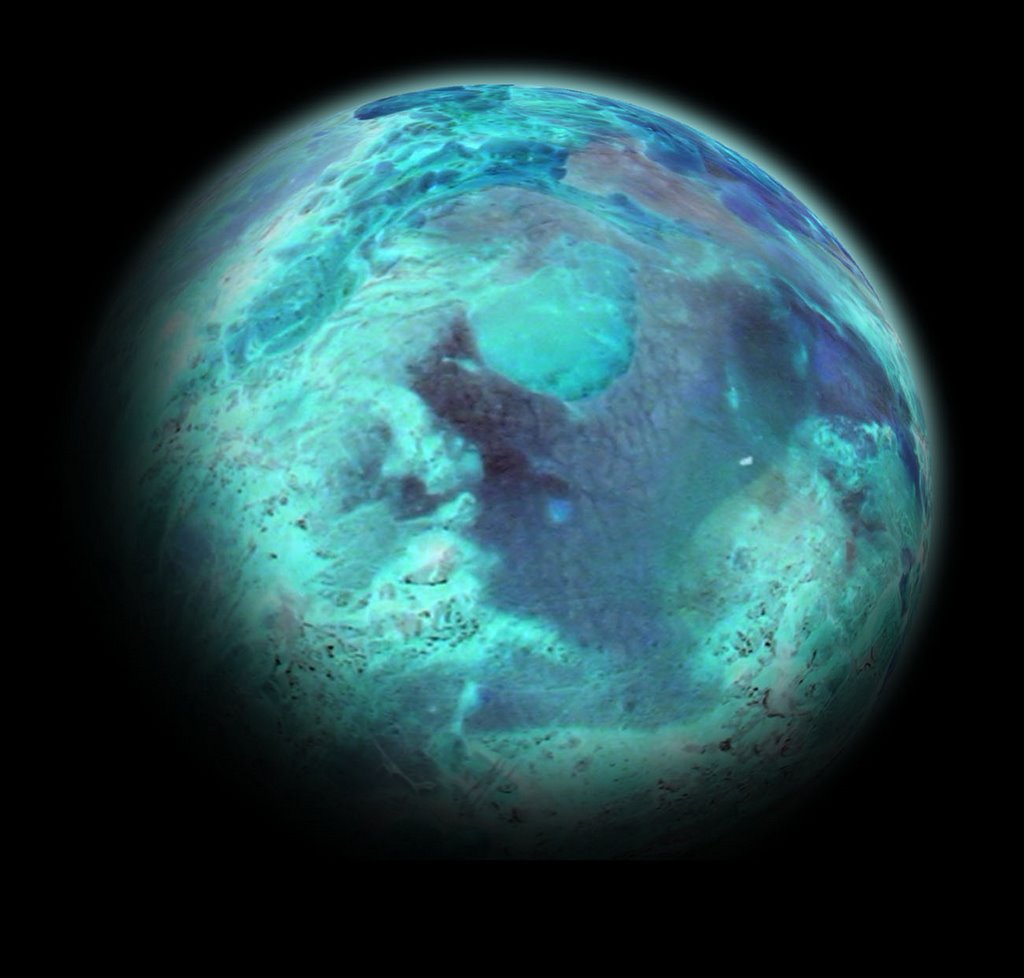
A few weeks ago I found this badass Photoshop tutorial on how to make planets (another similar tutorial is here). Using a shortened version of the programme outlined in the tutorial, I made the icy planet shown above, with its swirling clouds, ocean basins, and ice packs, in about 10 minutes. And I made it from a gory photo of a skinned emu. This post is a step-by-step explanation of how I did it.

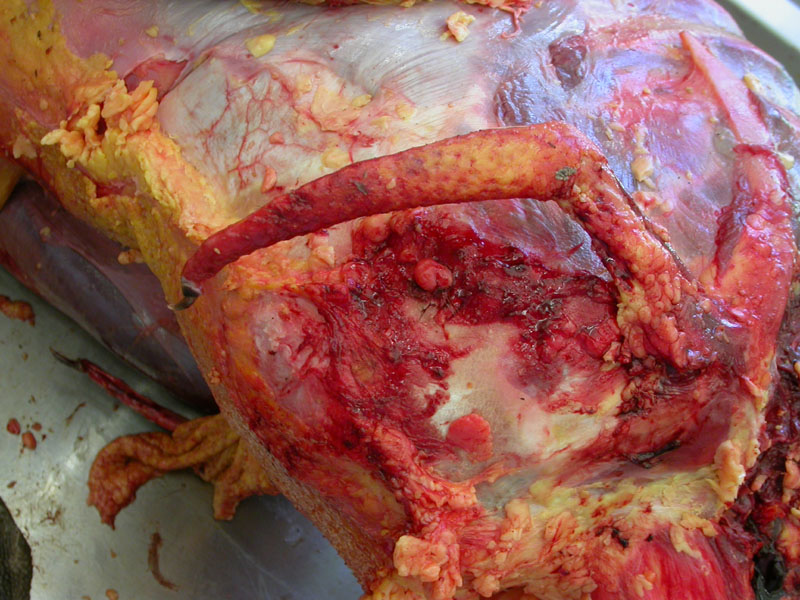
Note: this post is NOT intended as a replacement for the tutorials linked above. I took a lot of shortcuts, so this is at best a sort of "planets for dummies". But really I just want to explain how I made this yucky thing (below) into that beautiful planet.

A couple of years ago I got to scrub in and assist on the dissection of an emu. Here is a photo of the skinned right wing (complete with claw) and chest. The neck is out of sight at the bottom of the image, and the sternum forms the contour of the chest on the left side of the picture. This was the 8th planet I attempted, so I had developed a little bit of an eye for interesting textures.

Oh, I did all of this in Photoshop 5.5, which is pretty outdated but still good enough for everything I need to do. You should be able to do the same operations in other programs, and in fact there are several ways to do most of these things even in Photoshop. The first step is to use the circular marquee tool to select the region that is going to become your planet. In this case, I chose the ventrolateral wall of the chest, just forward of and below the wing. Copy that, paste it into a new layer, crop the background, and set it to black.

The step that makes a circular selection into a planet: spherize, and then spherize again (under Filters). Now I've got Planet Carcass. Yuck.

But by inverting the colors, I instantly got the planet. What is that, like 10 steps? Marquee, copy, paste, select background, clear to black, crop, spherize, spherize again, invert. That's it. Nine steps, and I've got a pretty good looking planet. If you want an evenly-lit, no-atmosphere-having rock, you're done.

There are lots of ways to get an atmosphere. My way is fast and easy, but it is admittedly not as sophisticated as the method outlined in the tutorial, nor does it yield the same results. But for my purposes, it's good enough.

The first step is to duplicate the planet layer, and move the new layer, named "Atmosphere", under the planet. I used the Numeric Transform to blow it up to 102%. Then I dropped the contrast and upped the brightness to get a white circle. That's what you see here: the planet sitting on top of a slightly-larger white circle.

Then you fill the white circle with whatever color you want your atmosphere to be (if the atmosphere isn't at least close to the dominant color of the planet, it looks pretty weird). The final step is to apply a Gaussian blur (another filter). You can fiddle with the specifications of the blur to get the atmosphere to stand out farther from the planet or pull it in tighter. I like a tighter atmosphere, because a big atmosphere glow (a) makes the planet look small, and (2) IMHO looks fake.

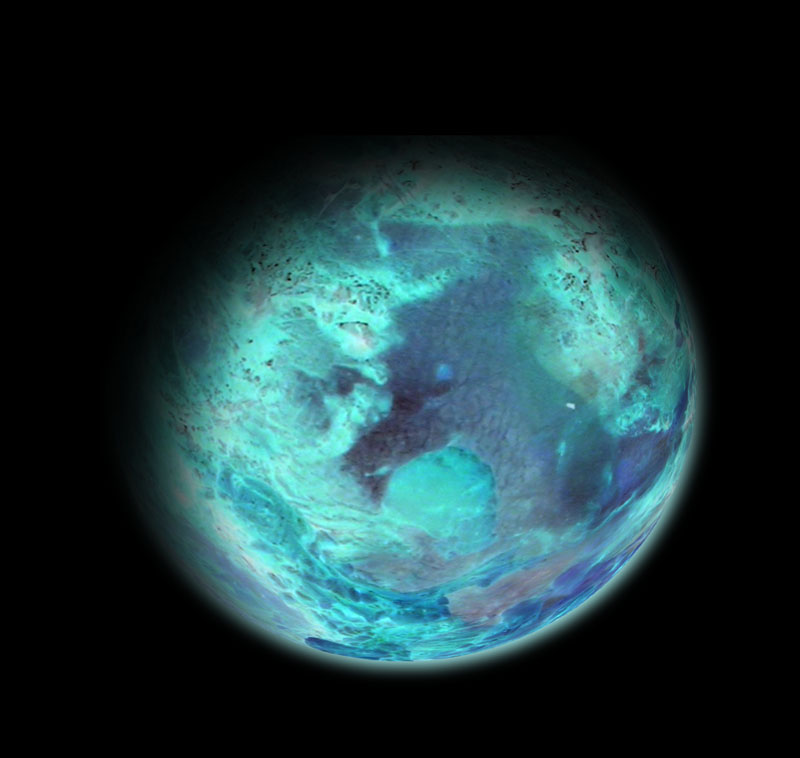
The final step is the shadow. Again, there are about a zillion ways to do this. Here's how I got mine. I made another layer on top of the planet and atmosphere layers and filled it with black. Then I created a huge-ass brush with very soft edges (low hardness) and just punched a planet-sized hole in the black layer. Then I dragged the shadow layer off center. This is kind of a fun step--you can drag the shadow around and decide which limb of your planet looks best. I liked the blue ocean area at the bottom of my planet, so I dragged the hole in that direction. But we're used to seeing things lit from above, so I flipped the picture over to make the final version shown at the beginning of the post.

That's it. Go make your own!

Labels: , , ,

Sunday, May 21, 2006

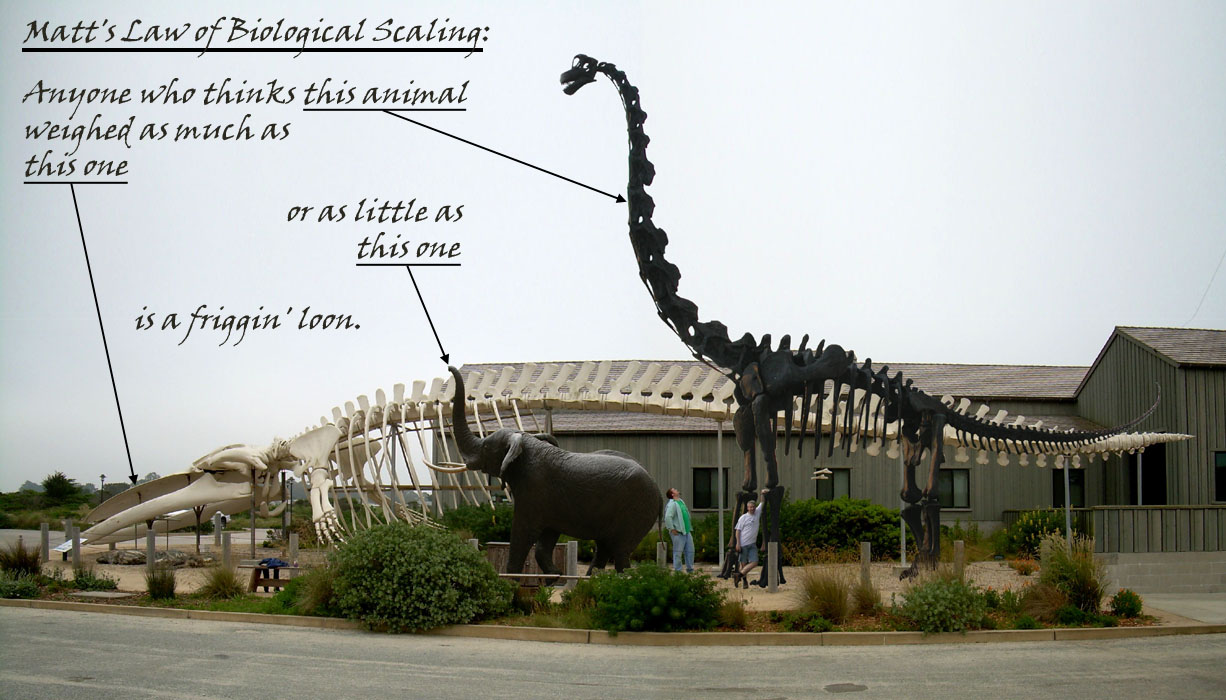
Matt's Law


Self-explanatory.

If you'd like a version of this image that hasn't had some wiseacre's verbal diarrhea squirted all over it, dig this:

Photoshop posts will continue until morale improves.

Labels: , , , ,

Thursday, May 18, 2006

Piling on the tetrapods


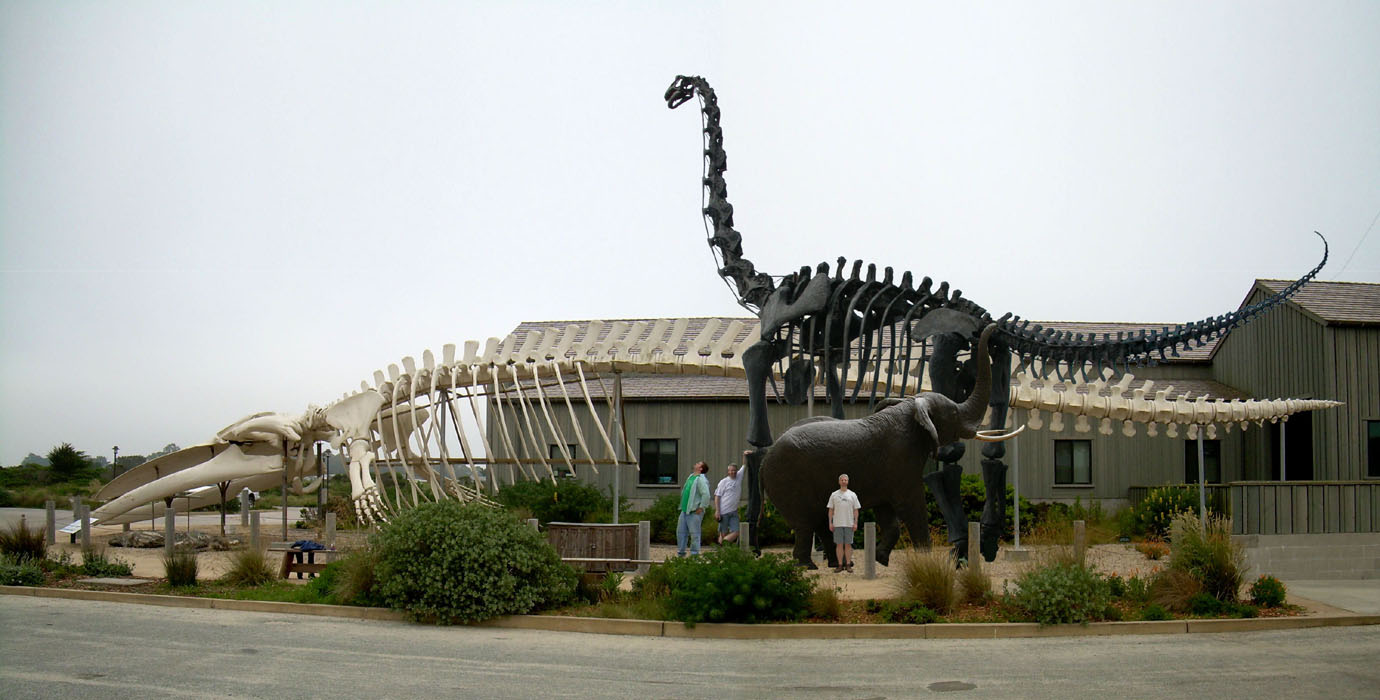
Here are three great tastes that taste great together: Balaenoptera musculus, Brachiosaurus altithorax, and Loxodonta africana. Plus Mike and me for scale. Many thanks to Photoshop for making this happy day possible.

The elephant and brachiosaur are both from the Field Museum in Chicago. Mike and I spent some quality time with them last summer, especially the Brachiosaurus skeleton. It is outdoors, so we could roam around it to our hearts' content, from the time the museum closed until it got too dark to see. One of the things we were trying to figure out is, how much might that animal have weighed?

This is not a trivial problem. Weighing large extant animals is no picnic. Almost all of the heights and weights of big elephants are to some extent estimates. When you shoot an elephant and it flops over, you can measure its length very accurately, but its giant body is no longer being compressed by gravity in the foot-to-shoulder axis and it stretches out some. Also, world record elephants tend to be shot out in the bush, very far from things like truck scales that would allow for accurate weight measurements. Usually the body is hacked up and weighed piecemeal, but there is some inevitable blood loss and so the summed weight of the chunks is not the weight of the animal in life. For both height and weight, a little guesswork is needed to figure out what the real measurement ought to be. The world record elephant was 13'8" lying on its side, and it is estimated to have been about 13'0" when standing. Conveniently, it weighed about 13 tons (these numbers are from the Guinness Book).

Now, using Photoshop and our not-yet-patented "stack of Mike" method, we pegged the mounted bull shown above with a shoulder height of 10 feet. In his paper on dinosaur models, Greg Paul (1997) cites a personal communication from someone at the Field Museum with the information that this animal weighed six tons. Because mass scales with the cube of the linear dimension, a 13-foot-tall elephant should weigh 2.2 times as much as a 10-footer, and indeed, 6 x 2.2 = 13.

One thing that occurred to us was to treat Brachiosaurus like a giant elephant. Brachiosaurus has a long pneumatic neck and the elephant has a big pneumatic head, so you can think of both of them as having a big air-filled mass of bone hanging off the front of their shoulders. In his book A Practical Guide to Vertebrate Mechanics, Chris McGowan gives some figures on a big bull elephant named Tantor. Tantor massed 6500 kg and his head was 750 kg, or a shade over 10% of his total mass. In the same paper mentioned above, Paul (1997) said that in sauropods the neck and head accounted for about 10% of the volume. So our elephant head/sauropod neck comparison is actually pretty close. The sauropod's tail is a bigger problem, but it probably only accounted for about 5% of the animal's mass, and the "stack of Mike" method is sufficiently non-rigorous for 5% error to be acceptable. On the flip side, elephants don't have air sacs or pneumatic postcranial bones, so a big sauropod would certainly have been less dense (but stupider).

BTW, the whale and elephant are in good lateral views, but the brachiosaur is foreshortened and that messes up the apparent proportions. The neck length is actually half again as long as the shoulder height, and the tail is about the same length as the neck. When you look at the composite photo, just imagine that the brachiosaur's tail is sticking out over the asphalt, and is not at all parallel to the whale's backbone.

Using the "stack of Mike" method, we found a shoulder height of 18 feet for the mounted Brachiosaurus. That fit well with what we've seen mentioned other places. If this Brachiosaurus was an elephant, it would have weighed 35 tons (1.8 cubed = 5.832, multiply that by six tons). For such a goofy method, that's a surprisingly satisfying answer. Colbert (1962) and Gunga et al. (1995) used volumetric methods and estimated the mass of Brachiosaurus at 78-80 tons, but in both cases the models are grotesquely obese, more like Macy's parade balloons than real animals. Alexander (1989) got 47 tons, but his model was also too fat, as Paul (1997) very convincingly demonstrated. Russell et al. (1980) used a limb regression equation to put the mass of Brachiosaurus at 15 tons. That just makes no sense. If a 13-foot-tall elephant weighs 13 tons, then an 18-foot-tall Brachiosaurus weighed a damn sight more than 15 tons. Anderson (1985) used limb bone regression and got 29 tons. Paul (1997) used volumetrics and got 32. Henderson (2003) used a digital volumetric model with realistic air sacs and got 26. Our 35 ton estimate is in pretty good company.

When we first cranked through these numbers last July, I wrote to Mike,

We can clearly disregard Russell's 15-ton estimate as crap, and anything over about 40 tons is ludicrous for that skeleton.

To which he replied,

Yes to 15 tonnes. I would not be so quick to dismiss over-forty estimates. Consider where the "shoulder" is. On the elephant, if you're talking about the highest point on the back -- which is a fairer comparison than the elevated head/neck -- then the height is maybe a little less than 10 feet. And it doesn't need to be much less to make a big difference. Six inches shorter, in fact, would bring the BOBA [Boring Old Brachiosaurus Altithorax] estimate up to 41 tonnes. Throw in the tail and I don't find 40 too extreme. (Dude!)

What is there left to say? This is the kind of thing I spend my time thinking about. And it illustrates a couple of points that you should always keep in mind:

1. Big animals are freakin' cool, man.
2. Measuring big animals is a kickass activity.

One last thing. None of the animals in the picture are record-holders. As I mentioned in the last post, the whale is, at 87 feet, about 80% of the size of the largest known individuals. The Brachiosaurus skeleton is about 85% of the size of the largest known specimens in the genus, and the elephant is 77% of the size of the world record. What a pathetic bunch of losers!

JK. They rule. Quite hard.

REFERENCES

Alexander, R.McN. 1989. Dynamics of Dinosaurs & Other Extinct Giants. Columbia University Press, New York, 167 pp.

Anderson, J.F., Hall-Martin, A., and Russell, D.A. 1985. Long-bone circumference and weight in mammals, birds and dinosaurs. Journal of Zoology 207:53-61.

Colbert, E.H. 1962. The weights of dinosaurs. American Museum Novitates 2076:1-16. (FREE online)

Gunga, H.C., Kirsch, K.A., et al. 1995. New data on the dimensions of Brachiosaurus brancai and their physiological implications. Naturwissenschaften 82:190-192.

Henderson, D. M. 2004. Tipsy punters: sauropod dinosaur pneumaticity, buoyancy and aquatic habits. Proceedings, Biological Sciences 271 (Suppl.): S180–S183.

Paul, G.S. 1997. Dinosaur models: the good, the bad, and using them to estimate the mass of dinosaurs. Dinofest International 1997:129-154.

Russell, D.A., Beland, P., and McIntosh, J.S. 1980. Paleoecology of the dinosaurs of Tendaguru. Memoirs de Societe Geologique de France 139:169-175.

Labels: , , , , ,