Building the Thunderhawk, Part II
More rocket construction pics. Go here for the first set.

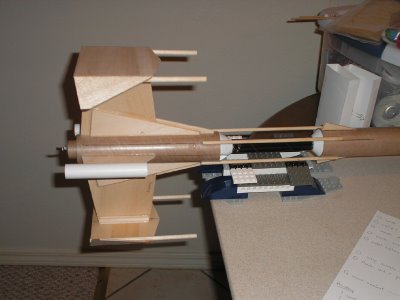
This picture follows on pretty closely from the last one in the first set. Here both wings are attached, but no cockpit, muzzle brakes, or screamers. The rocket is still laying on its side.

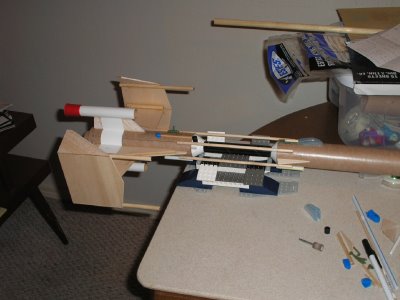
Here we're getting close to the end of construction. Just in front (to the right) of the fuselage transitions you can see the cockpit canopy in blue. I Dremeled it out of a breath mint container; the other half of the container is laying in front of the rocket. The red screamers (noisemakers) are glued into the dorsal and ventral pods, and I added cardstock panels to strengthen the fins.

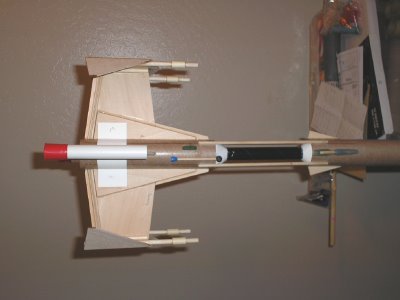
Here's the ass end of the rocket in dorsal view. I wrapped masking tape around the gun barrels to make muzzle brakes. The detail bits at the front of the aft fuselage are made from spare model airplane parts (green), more of that breath mint container (blue), and a pen cap (black), plus a piece of small dowel rod.

Time to detail the solar panels. This is fiberglass screen, cut with scissors over a traced wing pattern with a half-centimeter inset on all sides. Good shot of the cockpit canopy here too.
 At first I painted the whole rocket gray, thinking I'd go for black-on-gray coloring like a TIE Interceptor. But it looked too dull, so I repainted the whole thing red. The nose, solar panels, gun muzzle brakes, and fuselage braces are black, and you can see that the fuselage braces are still masked off. Still a fair amount of work to do. I need to paint the cockpit canopy, touch up the paint in about a dozen places, put on decals, and glosscote the whole thing. But it's coming along.

This picture follows on pretty closely from the last one in the first set. Here both wings are attached, but no cockpit, muzzle brakes, or screamers. The rocket is still laying on its side.

Here we're getting close to the end of construction. Just in front (to the right) of the fuselage transitions you can see the cockpit canopy in blue. I Dremeled it out of a breath mint container; the other half of the container is laying in front of the rocket. The red screamers (noisemakers) are glued into the dorsal and ventral pods, and I added cardstock panels to strengthen the fins.

Here's the ass end of the rocket in dorsal view. I wrapped masking tape around the gun barrels to make muzzle brakes. The detail bits at the front of the aft fuselage are made from spare model airplane parts (green), more of that breath mint container (blue), and a pen cap (black), plus a piece of small dowel rod.

Time to detail the solar panels. This is fiberglass screen, cut with scissors over a traced wing pattern with a half-centimeter inset on all sides. Good shot of the cockpit canopy here too.
 At first I painted the whole rocket gray, thinking I'd go for black-on-gray coloring like a TIE Interceptor. But it looked too dull, so I repainted the whole thing red. The nose, solar panels, gun muzzle brakes, and fuselage braces are black, and you can see that the fuselage braces are still masked off. Still a fair amount of work to do. I need to paint the cockpit canopy, touch up the paint in about a dozen places, put on decals, and glosscote the whole thing. But it's coming along.


0 Comments:
Post a Comment
<< Home